
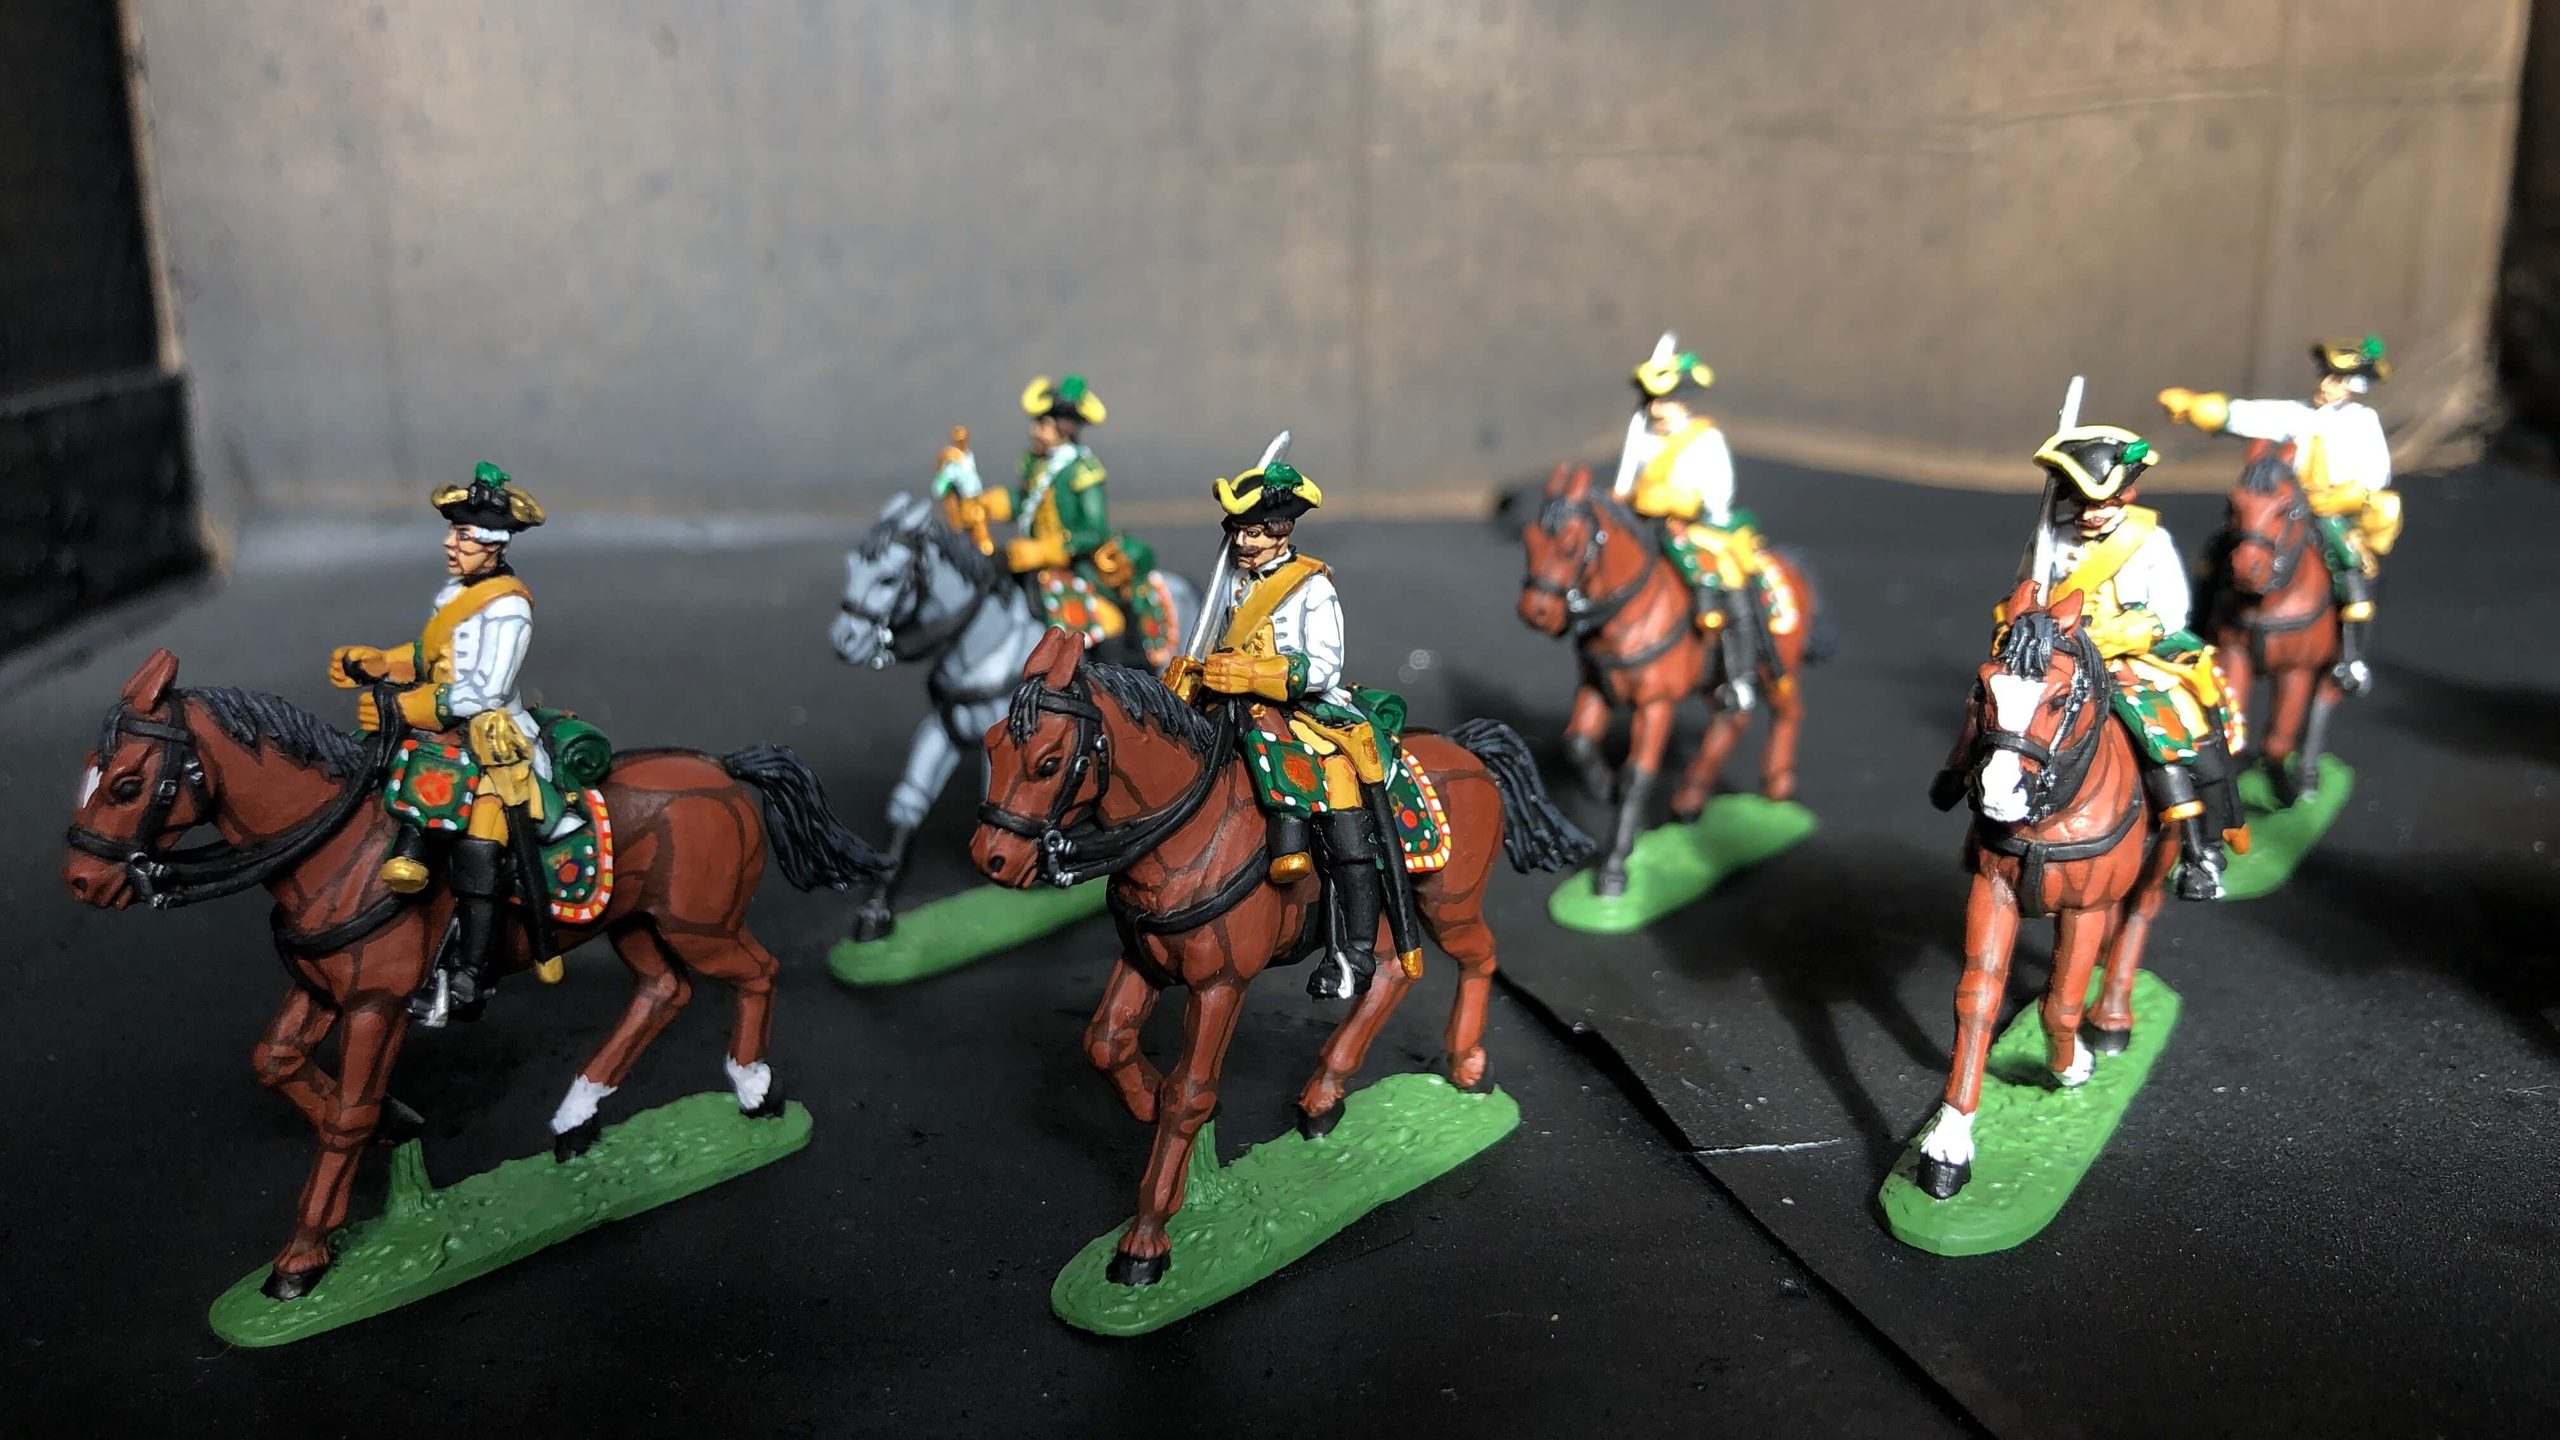
Painting horses for wargaming miniatures can feel more challenging than painting infantry. Their larger, smoother surfaces make uneven paint and uncontrolled shading more noticeable, while the shape of the body means that highlights need to follow the form of the animal.
The good news is that convincing horses do not require complicated techniques. A clean basecoat, controlled shading, simple highlights, and a few carefully chosen details are usually enough to create a strong result.
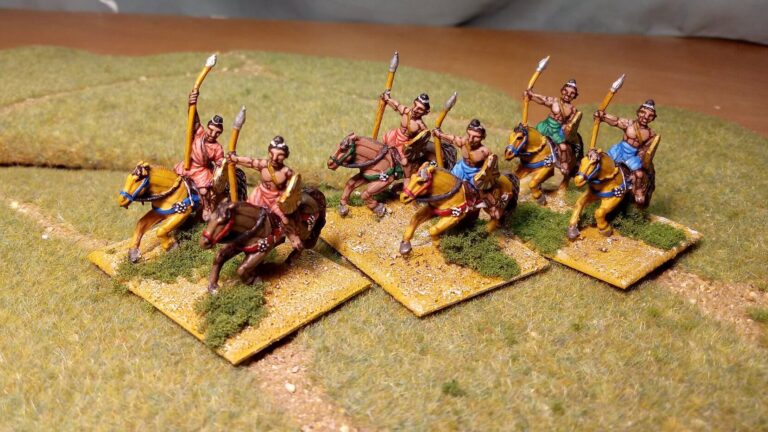
For historical wargaming, there is also plenty of room for variation. Cavalry units can include horses of different colors, while saddles, blankets, tack, markings, and heraldry provide opportunities to add character to individual models.
In this guide, we will look at practical techniques for painting horses, with a particular focus on historical and Napoleonic wargaming miniatures.
Table of Contents
Why Horses Can Be Challenging to Paint
Large Smooth Surfaces
One of the biggest differences between horses and many infantry miniatures is the amount of relatively smooth surface area.
The body, neck, and rump can expose uneven basecoats, brush marks, or excessive washes much more clearly than a heavily textured uniform or piece of equipment.
This makes controlled paint application especially important. Paint should still be slightly thinned and applied in thin coats, just as with other miniatures.
Two thin coats will usually produce a much cleaner base than trying to achieve complete coverage with one heavy layer.
Showing Muscle and Form
A horse has many anatomical forms that can be emphasized with shading and highlights. However, this does not mean that every individual muscle needs to be painted.
The goal is to make the main forms readable rather than to reproduce the anatomy in miniature.
A darker shade between major muscle groups, followed by a controlled highlight on raised areas, is often enough to create the impression of volume.
Highlights should describe the form, not draw every muscle.
This approach is particularly useful for wargaming miniatures, where clarity at normal viewing distance is usually more important than extremely subtle transitions.
Keeping Horses Readable at Wargaming Scale
Scale has a direct effect on how much detail is useful. At smaller scales, strong contrast and simplified details help the miniature remain readable. At 28mm and above, there is more room for subtle shading, markings, equipment, and freehand details.
Our Wargaming Scales and Materials Guide covers the relationship between scale, detail, and painting in more detail.
Common Horse Colors for Historical Wargaming
There are many possible horse colors, but you do not need to use every variation when painting a historical army.
For Napoleonic cavalry in particular, a combination of common coat colors can create a convincing and varied unit without making every horse completely unique.
Bay Horses
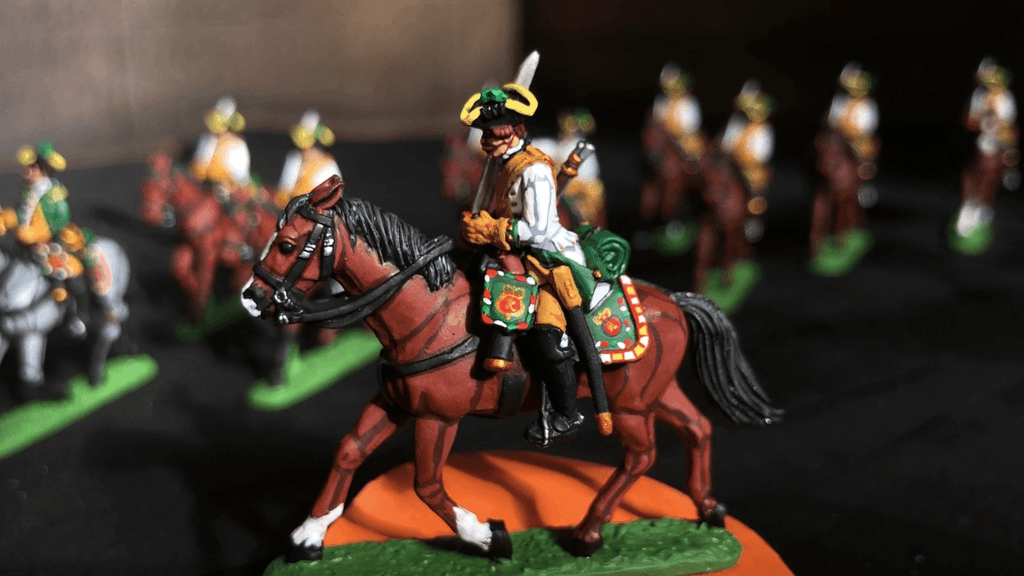
Bay is one of the most useful colors for historical cavalry.
The body can be painted in a warm brown or reddish-brown, while the mane, tail, and lower parts of the legs are generally darker. Bay horses also typically have black points, including the muzzle and the tips of the ears.
A common approach is to start with a brown basecoat, followed by darker shading and warm highlights, while keeping the mane, tail, and lower legs dark:
Brown basecoat → Darker shading → Warm highlights → Dark mane and tail
At Old Guard Painters, however, our artists often use a slightly different approach. We start by painting the dark areas, including the mane, tail, hooves, and shadows between the legs, before applying the brown basecoat and adding warm highlights.
Dark areas → Brown basecoat → Warm highlights
The highlights do not need to be dramatically brighter than the basecoat. A slightly warmer or lighter brown is often enough to bring out the shape of the neck, shoulders, and rump.
Chestnut Horses
Chestnut horses provide another useful reddish-brown option.
Compared with a typical bay, the mane and tail can remain closer to the main body color rather than being strongly contrasting.
Several different brown and reddish tones can be used across a cavalry unit to prevent every horse from looking identical while keeping the overall color palette coherent.
Grey Horses
Grey horses are particularly useful when painting cavalry units that need more variation.
A grey horse does not need to be painted as a completely flat light-grey miniature. Starting with a darker grey and gradually adding lighter areas can create much more definition.
The shading is particularly important here. Without enough contrast, a grey horse can quickly become visually flat.
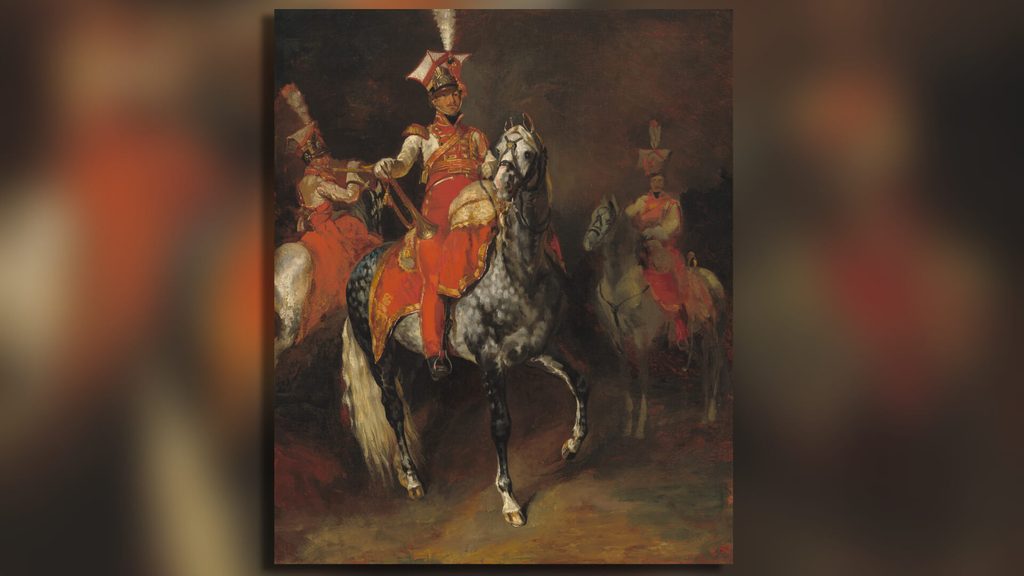
Grey horses can also be a useful choice for making important figures stand out on the tabletop. During the Napoleonic era, some cavalry units used grey horses for their trumpeters, making them easier to distinguish from the rest of the regiment. This gives you a historical reason to consider grey mounts for musicians and other figures you want to draw attention to, while also adding visual variety to the unit.
Black Horses
Black horses can be surprisingly difficult to paint.
Using pure black across the entire model leaves very little room for shading and highlighting. Instead, the main body can be kept very dark while highlights are introduced with a dark grey or another slightly lighter tone.
This preserves the impression of a black coat while allowing the shape of the horse to remain visible.
Black horses can also work particularly well with contrasting white markings, such as white socks or facial markings.
Other Horse Colors
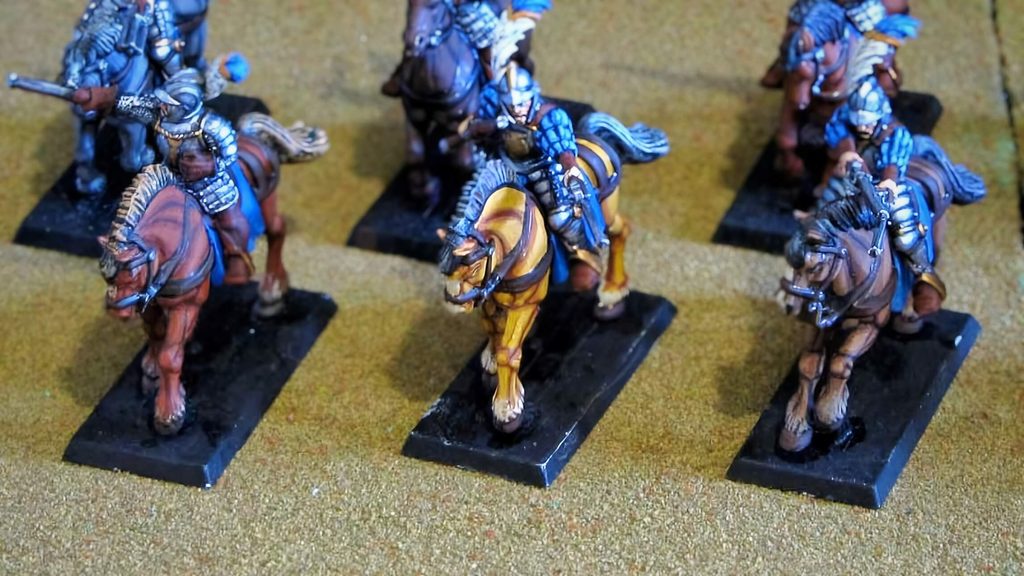
Palomino and other lighter or warmer horse colors can also be used when appropriate for the unit or historical subject.
The same principles still apply: establish a clean base color, create controlled shadows, and use highlights to describe the main forms.
For a wargaming army, it is usually more useful to have several well-defined coat colors than to spend excessive time trying to reproduce every possible variation found in real horses.
Starting with the Basecoat
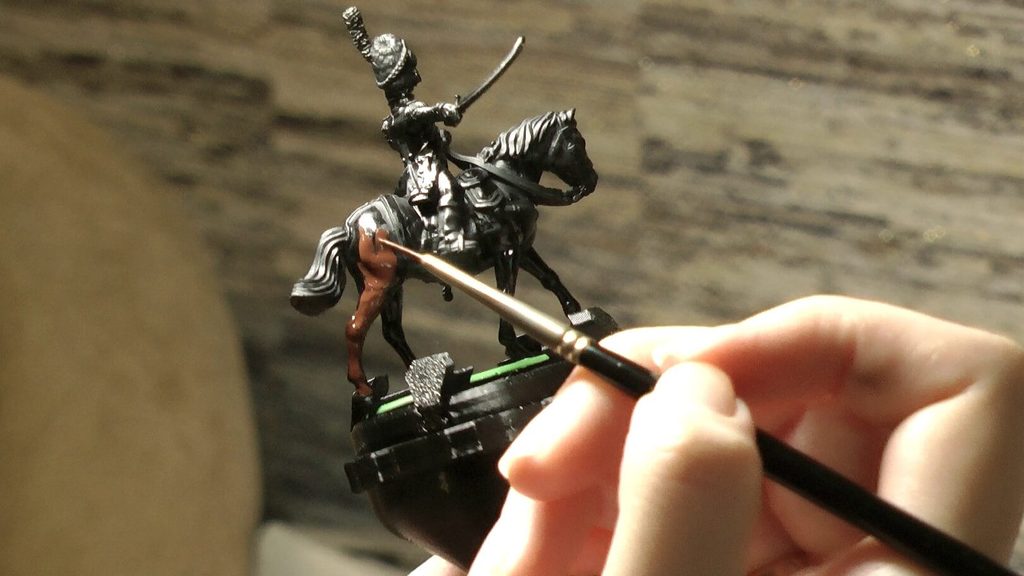
The basic principles of basecoating are the same as those used throughout miniature painting.
Paint should be slightly thinned so that it flows smoothly from the brush. If the paint is too thick, it can obscure details and create an uneven surface.
For a horse, aim for clean and consistent coverage over the entire body.
Do not worry if the first coat looks slightly uneven. A second thin coat will usually provide a much cleaner foundation.
Our guide to core miniature painting techniques covers basecoating, washes, layering, and highlights in more detail.
Shading the Horse
Shading gives the horse its three-dimensional appearance.
A wash is one of the simplest ways to introduce shadows, especially around:
- Muscle recesses
- The underside of the neck
- Between the legs
- Around the belly
- Around the base of the mane and tail
- Recesses around saddles and equipment
However, large smooth areas need some control.
Applying too much wash over the entire body can create visible stains and tide marks. This is especially noticeable on lighter horse colors.
Instead, allow the wash to settle naturally into the deeper areas and remove excess from large flat sections with a clean brush while it is still wet.
For a cleaner result, you can also restore some of the original base color after the wash has dried. This leaves the darker color in the recesses while bringing the larger surfaces back under control.
A simple workflow is:
Basecoat → Wash/Shading → Restore base color → Highlights
This is often enough to create a convincing horse without requiring complex blending.
Highlighting the Coat
Once the shading is complete, highlights can be added to the areas that naturally catch more light.
On a horse, this commonly includes:
- The upper part of the neck
- Shoulders
- Upper parts of the body
- The rump
- Raised areas of the legs
- Prominent facial areas
The exact placement will depend on the pose of the miniature.
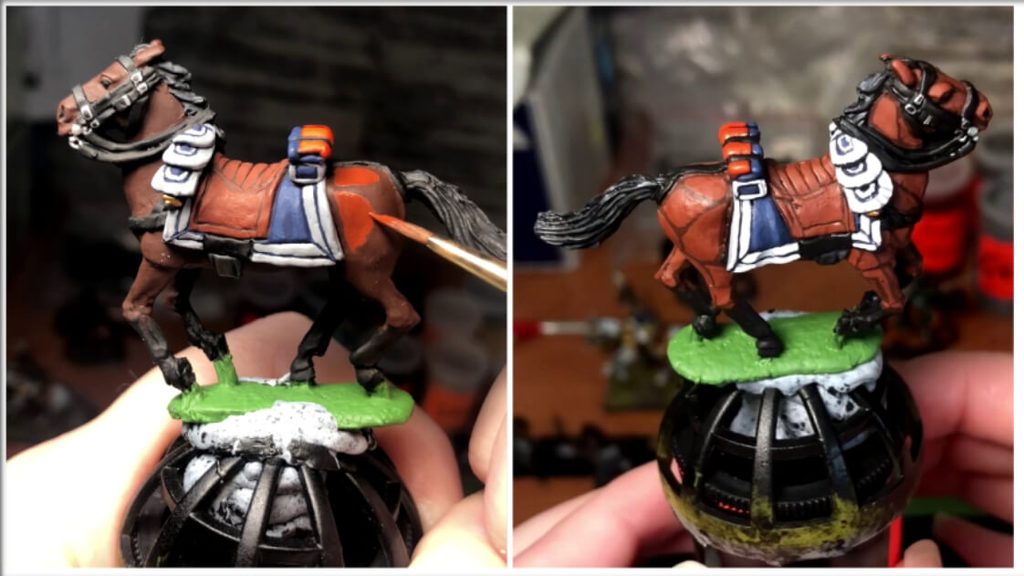
At 28mm, one or two highlight stages are often enough. The transitions do not need to be perfectly smooth. Clear contrast usually has a greater visual impact at tabletop distance than spending a large amount of time trying to create invisible transitions.
For darker horses, keep the highlights relatively restrained. A black horse highlighted with a very bright grey can quickly stop looking black.
Painting the Mane, Tail, and Hooves
The mane and tail can be painted using the same basic approach as other textured areas.
Start with the main color, apply darker shading into the recesses, and then add lighter strokes following the direction of the hair.
These highlights do not need to cover every strand. A few controlled lines are usually enough to suggest the texture.
Hooves can also be kept relatively simple. Dark brown, grey, or black tones can all work depending on the horse and the overall color scheme.
If the miniature has molded horseshoes, such as on a horse with a raised hoof, paint them silver to make them stand out from the hoof itself.
As with other small details, the aim is not to make every feature equally prominent. The most important thing is that the hoof remains visually separate from the leg and base.
Painting White Socks and Facial Markings
White markings are a useful way to add variation to horses, particularly when several models share the same basic coat color.
White Socks
White socks can be painted with a relatively simple transition from the main coat color into white.
One approach is to use a slightly thinned paint and build the transition gradually. Another technique, used by some painters, is to create the transition directly with the brush.
Rather than painting a hard line between brown and white, apply the lighter color progressively while reducing the pressure on the brush. As the transition approaches the horse’s coat color, the brush barely touches the surface. This produces a soft edge without requiring complicated airbrushing or extensive blending.
For an extra touch of realism, consider painting the hoof a light horn color when a horse has a white marking extending down to it. Dark hooves can still be appropriate on some horses, so treat this as a useful detail rather than a strict rule.
The important part is not to make every sock perfectly identical. Slight differences in height and shape can make the markings look more natural.
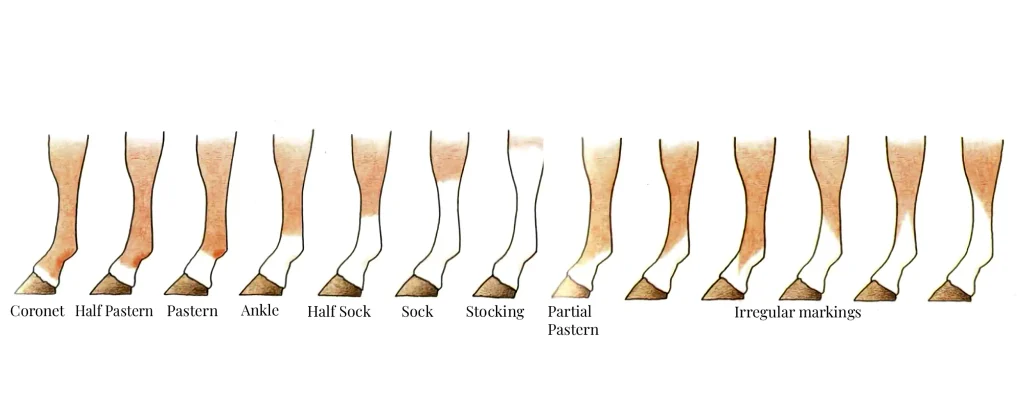
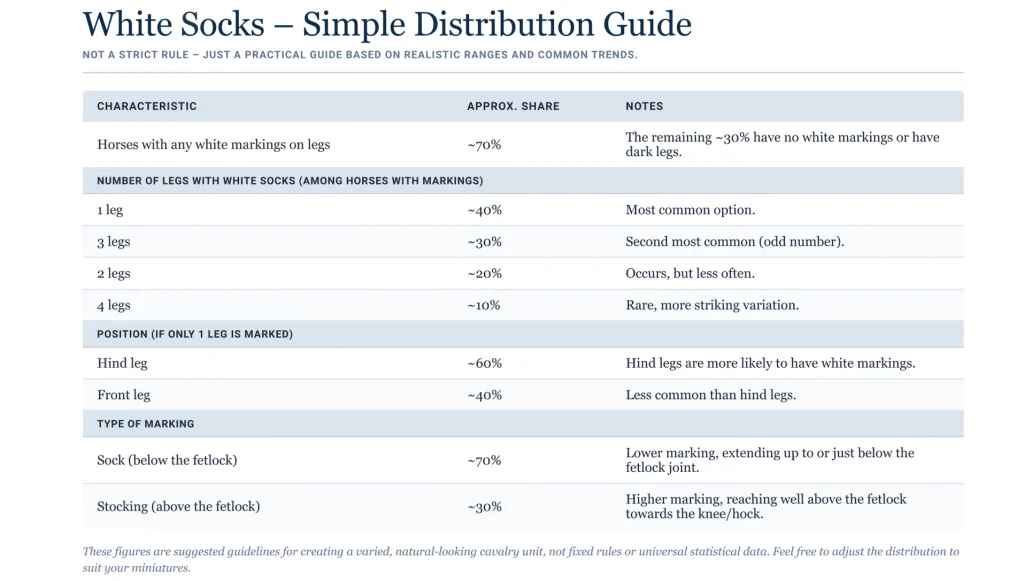
The guide below offers a simple starting point for distributing white leg markings across a unit. It is not a strict rule, but a useful way to create variety when painting several horses together.
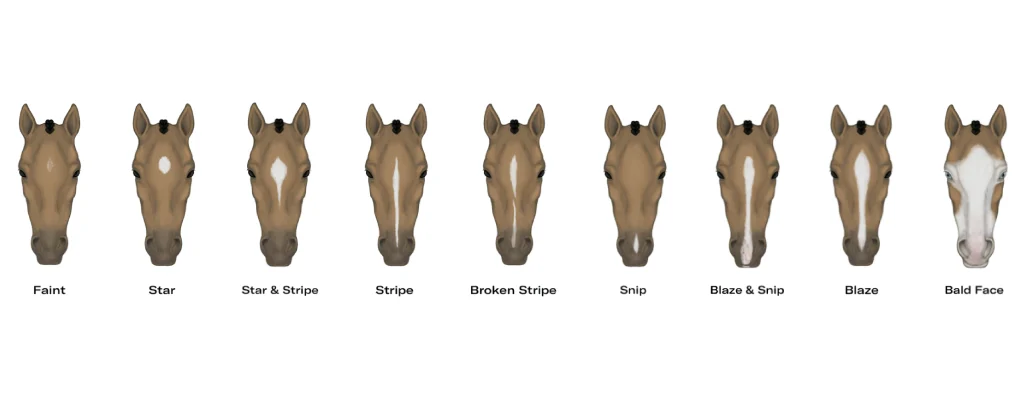
Facial Markings
Simple facial markings such as stars and blazes can add a surprising amount of character.
At wargaming scale, these do not need to reproduce every irregularity found on a real horse. A clean, simplified marking will usually read better than an extremely subtle pattern that disappears at tabletop distance.
Painting Saddles, Tack, and Horse Equipment
Once the horse itself is complete, the saddle and equipment can be painted.
Common details include:
- Saddles
- Leather straps
- Reins
- Saddle blankets
- Metal fittings
- Stirrup irons
- Decorative equipment
Leather can be treated with the same basecoat, shading, and highlighting principles used on other parts of a miniature.
It is also useful to remember that horse equipment provides another opportunity to create visual cohesion within a unit. Similar saddle colors, blanket colors, or equipment details can help a group of individually painted horses look like a single cavalry force.
Painting Heraldry and Decorative Details
Larger historical miniatures provide an excellent opportunity for freehand work.
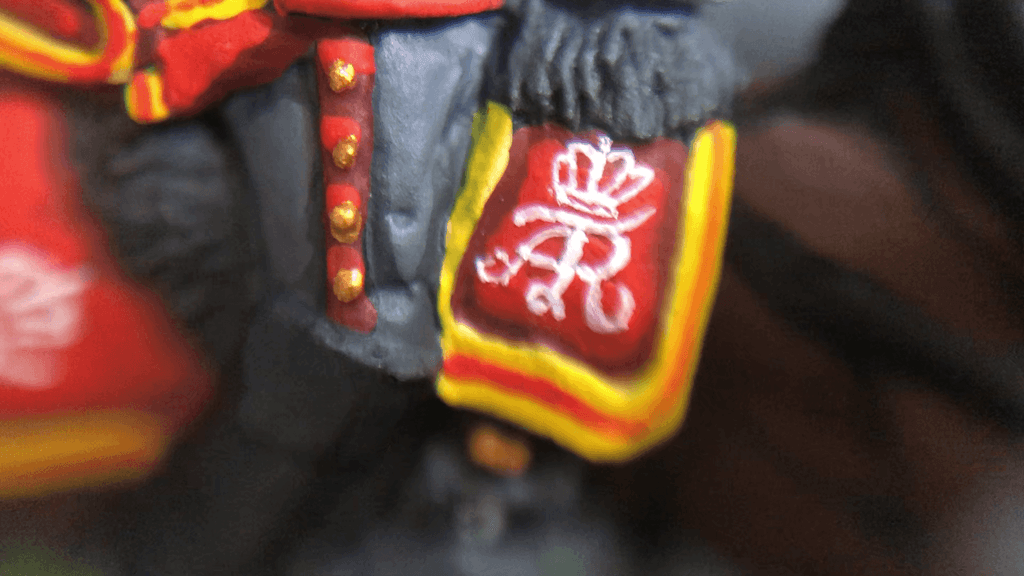
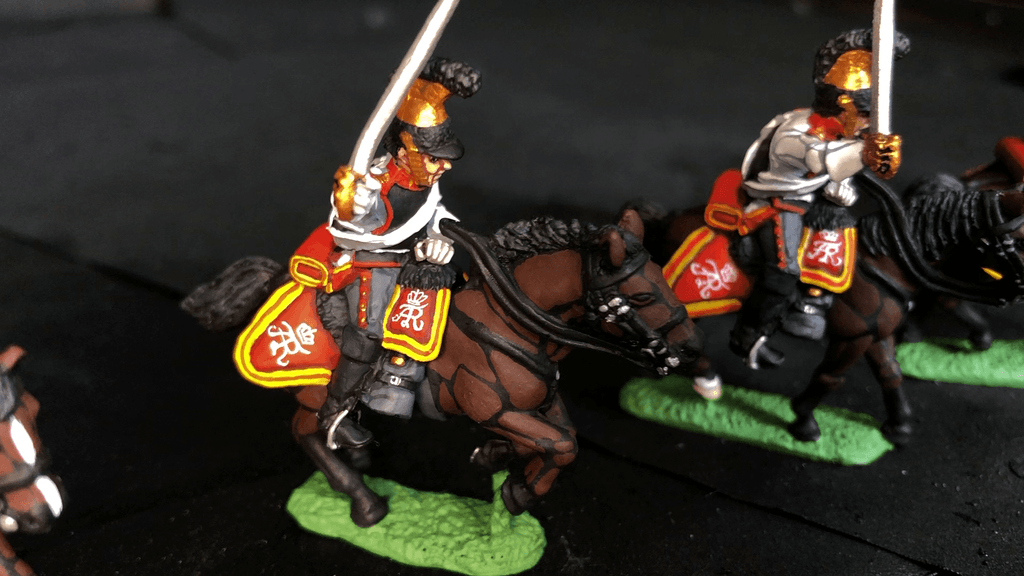
The horse examples shown in our studio include decorative saddlecloths, contrasting borders, symbols, and heraldic details. These can look complicated at first, but the same principle used throughout miniature painting applies here: work from large shapes to small details.
Start with the Main Shapes
Do not begin with the smallest symbol.
First establish the main color of the cloth or saddle blanket. Then add the larger decorative shapes and border.
After that, smaller symbols and details can be added.
A useful order is:
Main color → Border → Large decorative shapes → Main symbol → Small details
This makes mistakes much easier to correct.
If a small freehand detail goes wrong, the surrounding color can often be used to clean up the edge before continuing.
Simplifying Historical Heraldry
Historical heraldry can contain an enormous amount of detail. On a 28mm miniature, trying to reproduce every line exactly can easily make the result harder to read.
Instead, focus on the features that define the design:
- Main colors
- Overall shape
- Main symbol
- Strong contrasting elements
- Characteristic border or pattern
The goal is not to turn a miniature into a perfectly scaled historical document. The goal is to create a recognizable design that works at the scale of the model.
Painting Small Freehand Designs
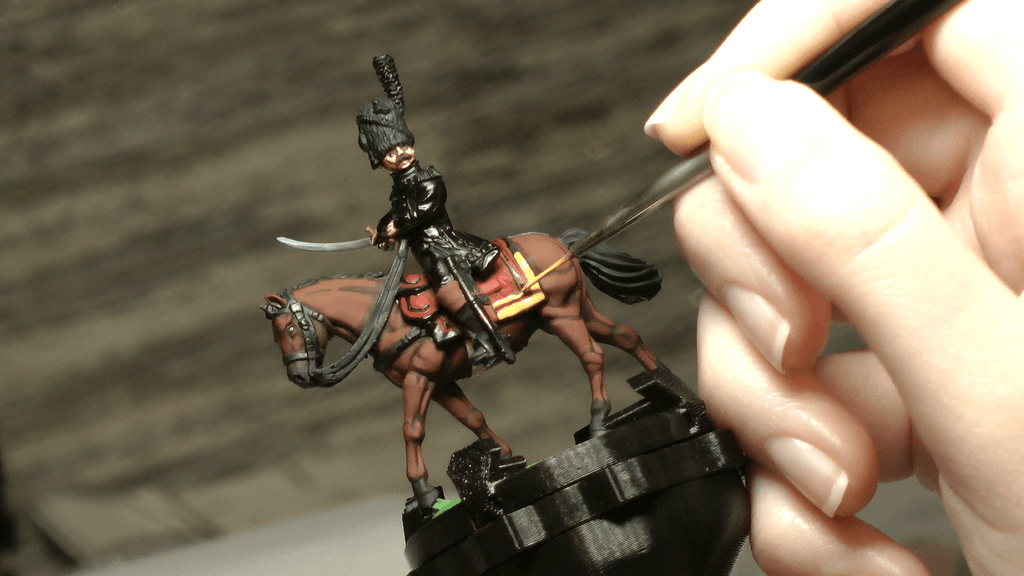
Freehand painting benefits from thin paint and a steady brush.
It is usually easier to build a design gradually than to try to paint the complete symbol in one pass. Larger shapes can be established first, followed by smaller details once the basic design is in place.
Good lighting is especially important here. At this scale, even a small movement can change the shape of a symbol considerably.
And remember that correction is part of the process. If an edge becomes uneven, simply use the surrounding color to clean it up and continue.
Painting Medieval and Armoured Horses
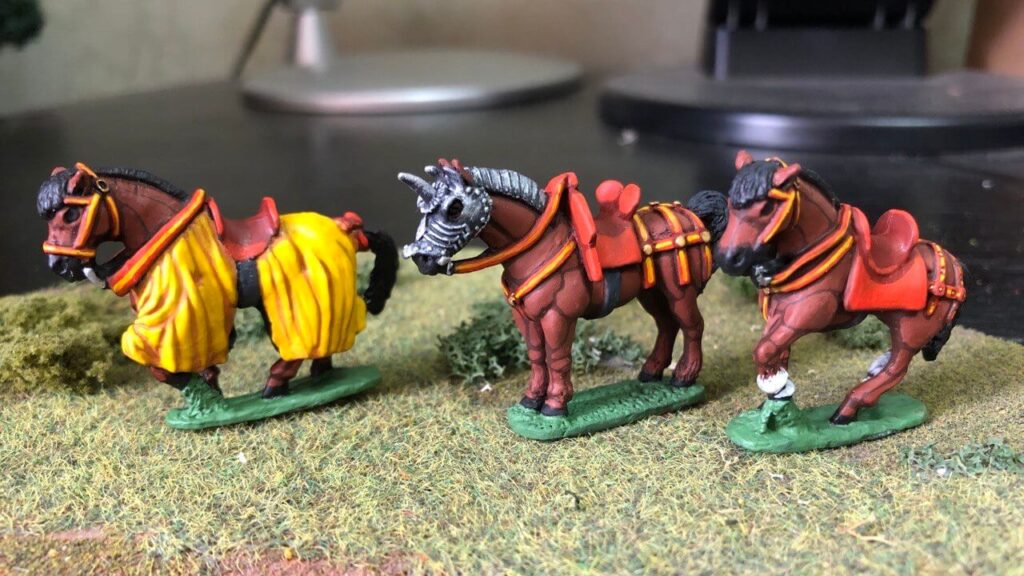
Although Napoleonic cavalry provides many excellent examples for horse painting, the same techniques can be applied to medieval miniatures.
Armoured horses introduce additional surfaces such as metal barding, decorative cloth, and heraldic designs.
Cloth-covered sections provide another opportunity for color and heraldry. Larger medieval designs can often be simplified in exactly the same way as Napoleonic saddlecloth decorations.
The main difference is simply the amount and type of equipment covering the horse.
Painting Metal Horse Armour
When painting armoured horses, it is often easier to finish the metal areas before painting the horse’s body. Start with a dark metallic basecoat, then apply a lighter metallic drybrush to pick out raised details and edges.
Dark metallic basecoat → Lighter metallic drybrush → Paint the horse’s body
Drybrushing can leave stray paint on nearby surfaces, so completing the metallic work first helps avoid unwanted metallic marks on the horse’s coat. Once the armour is finished, you can paint the horse’s body and refine the remaining details.
If some metallic paint gets onto the horse’s body, tidy up the affected area when applying the base colors for the coat.
Painting Animal-Skin Details
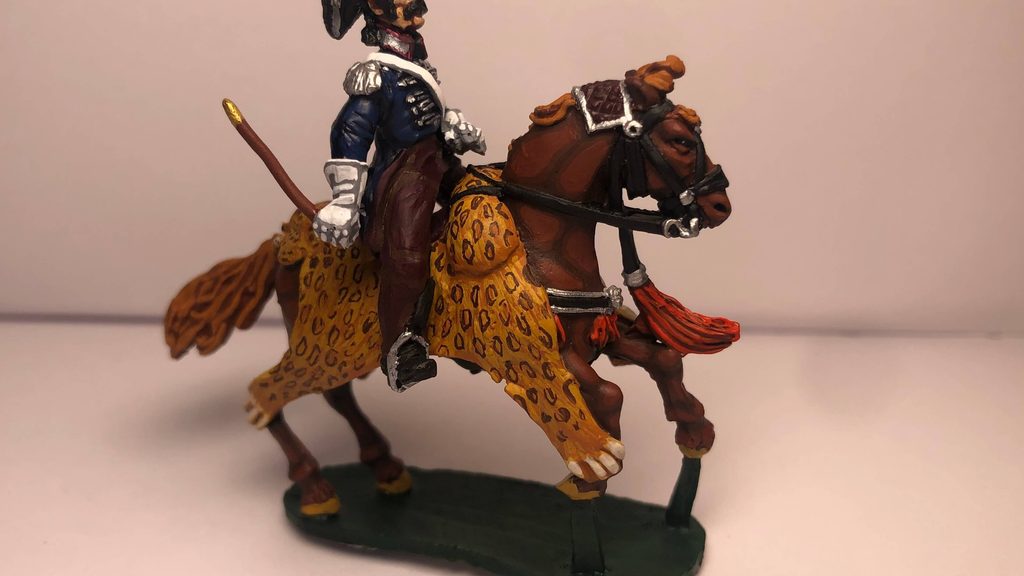
Some historical miniatures include decorative animal skins or fur, such as leopard-patterned cloth or other natural textures.
These details can look complicated, but they do not require painting every individual hair or spot.
Start with the overall color of the material, then add larger irregular markings. Smaller dots or highlights can be added afterward where they remain visible.
Avoid making every marking perfectly uniform. Natural patterns are irregular, and a slightly uneven arrangement usually looks more convincing than a repeated pattern.
Painting Cavalry Units
Painting a single horse gives you the opportunity to focus on detail. Painting an entire cavalry unit introduces a different challenge: making the models look varied while still belonging together.
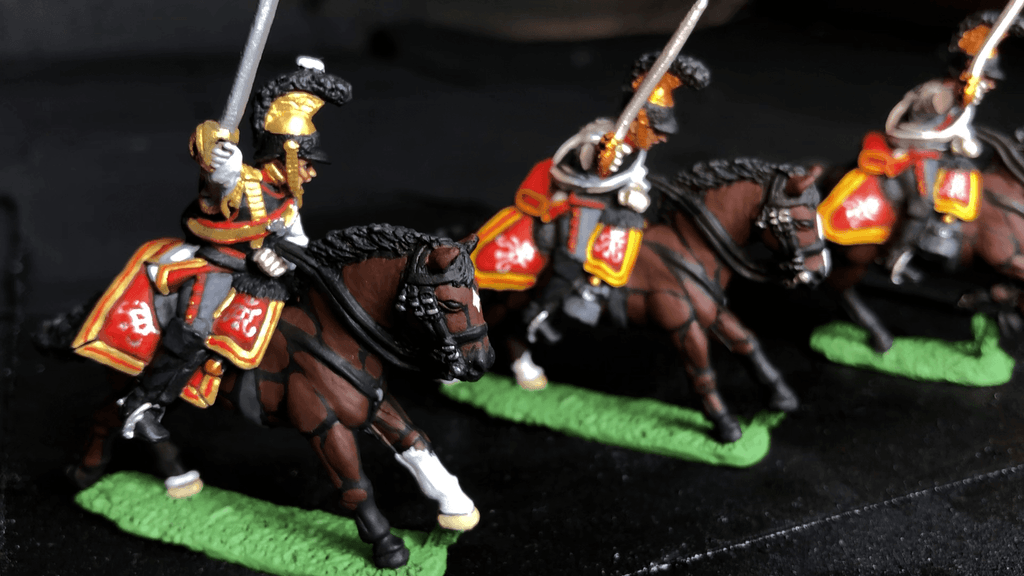
Don’t Make Every Horse Identical
A cavalry unit does not need to consist of identical horses.
Using several coat colors can add natural variation while keeping the models historically appropriate to the project.
For example, a unit might combine several bay and chestnut horses with a number of grey horses and an occasional black horse.
The exact combination will depend on the historical subject and the painting project, but the general principle is simple: variation does not mean randomness.
Keep the Unit Cohesive
Even when the horses have different coat colors, the unit can still look unified through shared details.
Consistent basing, similar painting contrast, matching equipment colors, and coordinated heraldry can all help.
Basing is particularly effective at tying models together. Our guide to miniature basing covers simple techniques for creating consistent bases across a unit or collection.
Consider the Scale
The amount of detail should always match the miniature.
At smaller scales, a horse’s coat may only need a few strong color transitions and clearly defined equipment. At 28mm and above, more detailed markings, heraldry, and freehand work become practical.
Trying to reproduce every detail regardless of scale usually creates more work without necessarily improving the finished unit.
Common Horse Painting Mistakes
Several problems appear regularly when painting horses.
Pure Black Horses
Leaving a black horse completely black removes most of the visible definition.
Use subtle dark-grey or similarly restrained highlights to describe the form while keeping the overall coat dark.
Too Much Wash
Large smooth areas can easily become blotchy when too much wash is applied.
Control the wash and remove excess from broad surfaces while it is still wet.
Highlights That Are Too Bright
Strong highlights can make a horse look unnatural, especially on darker coats.
Highlights should support the main color rather than completely change it.
Painting Every Muscle
Overemphasizing anatomy can make a horse look segmented rather than natural.
Focus on the major forms and let shading do some of the work.
Making Every Horse Identical
A unit containing several completely identical horses can look repetitive.
Using a few different coat colors and subtle variations in markings can add much more visual interest.
Overcomplicating Heraldry
Small historical designs can contain more detail than a miniature can realistically display.
Simplifying the design to its most recognizable shapes and colors will often produce a clearer result.
Making Markings Too Perfect
White socks, facial markings, and other natural patterns do not need to be perfectly symmetrical.
Small variations make individual horses feel less repetitive and can add character to the unit.
How Horse Painting Fits into the Overall Painting Process
There is no single correct order for every project, but a practical workflow for a cavalry miniature might look like this:
Preparation → Basecoat → Shading → Highlights → Mane & Tail → Markings → Tack & Equipment → Heraldry → Basing
The exact order can change depending on the miniature.
For example, some painters may complete certain equipment before the horse’s final highlights, while others prefer to finish the horse completely first.
What matters most is keeping the process controlled and avoiding unnecessary rework.
Proper preparation and priming provide the foundation for the entire process. If you are starting with unpainted models, our guide to preparing miniatures for painting covers the preparation stage in more detail.
Final Thoughts
Painting horses does not require complicated techniques. A clean basecoat, controlled shading, a few well-placed highlights, and carefully chosen details can transform a simple cavalry miniature into a convincing finished model.
For historical wargaming, there is also plenty of room for variation. Different horse colors, natural markings, equipment, heraldry, and decorative details can make individual models distinctive while still allowing the entire unit to work together.
At tabletop distance, clear contrast and good readability matter more than painting every anatomical detail or reproducing every historical pattern perfectly.
As with most miniature painting, consistency matters more than complexity.
A group of well-defined horses with coherent colors, equipment, and basing will usually have a stronger visual impact than a collection of individually overworked models.
The goal is not to paint every possible detail. The goal is to choose the details that matter and execute them cleanly.